How to create an encrypted USB stick
Creating an encrypted USB stick under GNU/Linux is fairly ease. First lets install required packages and erase everything from the stick
gives good overview of where is what: (in a tree view style)
hostnamectl; # tested on
Operating System: Debian GNU/Linux 12 (bookworm)
          Kernel: Linux 6.1.0-13-amd64
    Architecture: x86-64

su - root

# study carefully where is what
lsblk -o 'NAME,MAJ:MIN,RM,SIZE,RO,FSTYPE,MOUNTPOINT,UUID'

# alternatively: before connecting the new disk
while true; do dmesg; sleep 3; clear; done;
# connect the new disk, dmesg should tell infos about drive and new drive letter
this used to work well, but failed once for NVMe USB drive 🙁
so for NVMe USB drive better use gparted to make an UNFORMATTED partition and then continue with the luks commands.
# Warning! DOUBLE TRIPPLE CHECK TO GET THE RIGHT DRIVE LETTER!
export USB_STICK="/dev/sdX"

apt-get install parted cryptsetup-bin

# optional if it is a new disk
shred -n 10 -v -z "${USB_STICK}"
process can take some time depending on the stick’s size. After it’s finished, we can create a partition table
parted -s -a optimal "${USB_STICK}" -- mklabel msdos mkpart primary ext2 1 -1

# if it is a disk larger than 4TB it will throw an error?
Error: partition length of 7814033408 sectors exceeds the msdos-partition-table-imposed maximum of 4294967295

# use gpt partition table then
parted -s -a optimal "${USB_STICK}" -- mklabel gpt mkpart primary ext2 1 -1
finally create an AES encrypted partition
it might be needed to 1) sync 2) disconnect 3) reconnect the stick now
export ENCRYPTED_PART="${USB_STICK}1"

# double-tripple check this worked
echo "will create new encrypted partition as: "$ENCRYPTED_PART

# how to label the new drive
export ENCRYPTED_PART_NAME="CryptStick"

cryptsetup --verify-passphrase luksFormat "${ENCRYPTED_PART}" --cipher aes --key-size 256 --hash sha256

WARNING!
========
This will overwrite data on /dev/sdX1 irrevocably.
Are you sure? (Type 'yes' in capital letters): YES

Enter passphrase for /dev/sdX1:
verify:

cryptsetup luksOpen "${ENCRYPTED_PART}" "${ENCRYPTED_PART_NAME}"

Enter passphrase for /dev/sdX1: # enter the password just used for encryption

mkfs.ext4 -L "${ENCRYPTED_PART_NAME}" "/dev/mapper/${ENCRYPTED_PART_NAME}"

cryptsetup close "${ENCRYPTED_PART_NAME}"

sync
Now the encrypted stick is ready to use!
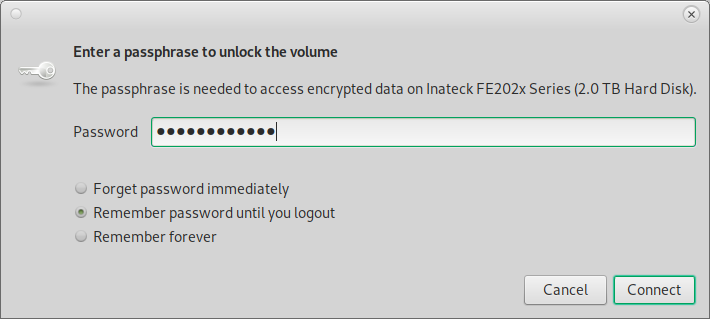
simply unplug it and re-attach it, and it should ask for password to decrypt and mount the drive
or: manually mounting the drive:![]()
export USERNAME=user;

echo "will mount the drive for: "$USERNAME

export MOUNTPOINT="/media/${USERNAME}/${ENCRYPTED_PART_NAME}"
# double check
echo "mountpoint: "${MOUNTPOINT}
mkdir -p "${MOUNTPOINT}"

cryptsetup luksOpen "${ENCRYPTED_PART}" "${ENCRYPTED_PART_NAME}"

mount "/dev/mapper/${ENCRYPTED_PART_NAME}" "${MOUNTPOINT}"

# check that it was mounted correctly
mount|grep "${ENCRYPTED_PART_NAME}"

# should show
/dev/mapper/EncryptedBackup2 on /media/user/EncryptedBackup2 type ext4 (rw,relatime)

# alternatively:
lsblk|less

# test write to the newly created encrypted disk
echo "testfile was successfully written to encrypted drive :D" > "${MOUNTPOINT}/file.txt"

# read from testfile
# to verify it is working :D
cat "${MOUNTPOINT}/file.txt"
sync
umount "${MOUNTPOINT}"

cryptsetup close "${ENCRYPTED_PART_NAME}"
congratz! 😀
celebrate at least 3 min to this electronic music (or this analogue music) or other music 😀

how to filesystem check the device?
# find out what mapper calls the device
lsblk -o 'NAME,MAJ:MIN,RM,SIZE,RO,FSTYPE,MOUNTPOINT,UUID'
unmount /dev/mapper/luks-e2889390-8542-4a07-a59c-123123123123
fsck -y -v -f /dev/mapper/luks-e2889390-8542-4a07-a59c-123123123123
creditz: https://www.wyb.cz/2016/02/21/creating-encrypted-usb-stick/
liked this article?
- only together we can create a truly free world
- plz support dwaves to keep it up & running!
- (yes the info on the internet is (mostly) free but beer is still not free (still have to work on that))
- really really hate advertisement
- contribute: whenever a solution was found, blog about it for others to find!
- talk about, recommend & link to this blog and articles
- thanks to all who contribute!


