most important:
use the WatchPower version that comes on CD with the solar charge controller, as newer or older versions might not be working (incompatible, changes in protocol etc)
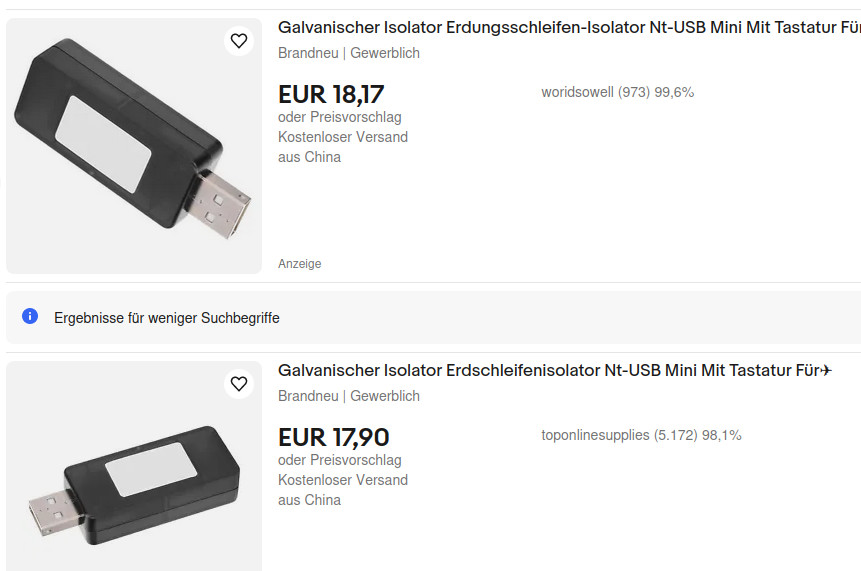
it might wise to use a galvanic isolator (even the shielding is isolated = no direct connection, because N+PE is bridged in this device!)
if no CD was shiped, try to find out what version is shipped and works
ultimate documentation
forum thread concerning this topic can be found here.
the protocoll: Voltronic_Auslesen_Protocoll_HS_MS_MSX_RS232_Protocol_20140822_after_current_upgrade.pdf
Communication format: Baud rate: 2400 Start bit: 1 Data bit: 8 Parity bit: N Stop bit: 1
how to run WatchPower under GNU Linux
PARTLY FINISHED HOWTO! (WÖRK IN PROGRESS)
connect both cables: the USB(A)toUSB(B) and com-to-RJ45 between inverter and PC
USB(A)toUSB(B) cable (ttyUSB0) worked: no need to buy this this adapter (OPTIONAL but good to have in case of firmware flashing)
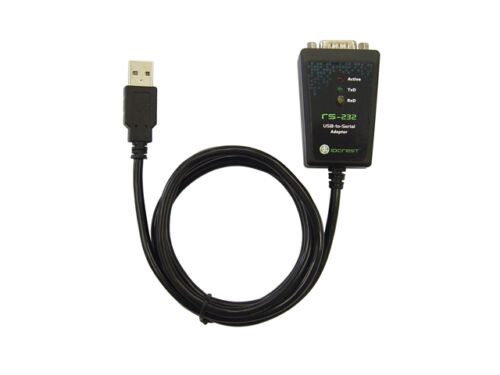
this is said to be a good adapter if no adapter was shipped: IOCrest USB to Serial Port Converter Cable RS232 DB9 (FTDI Chipset) 232A
there is a thread on this as well
untested:
- https://www.amazon.de/LogiLink-Male-Serial-Adaptor-FTDI/dp/B00ECJEPKQ/
- https://www.amazon.de/-/en/Sabrent-Adapter-Converter-Windows-CB-FTDI/dp/B006AA04K0/
- https://www.amazon.de/-/en/Adapter-FT232RL-Chipset-Supports-Windows/dp/B09LTTWMZR/
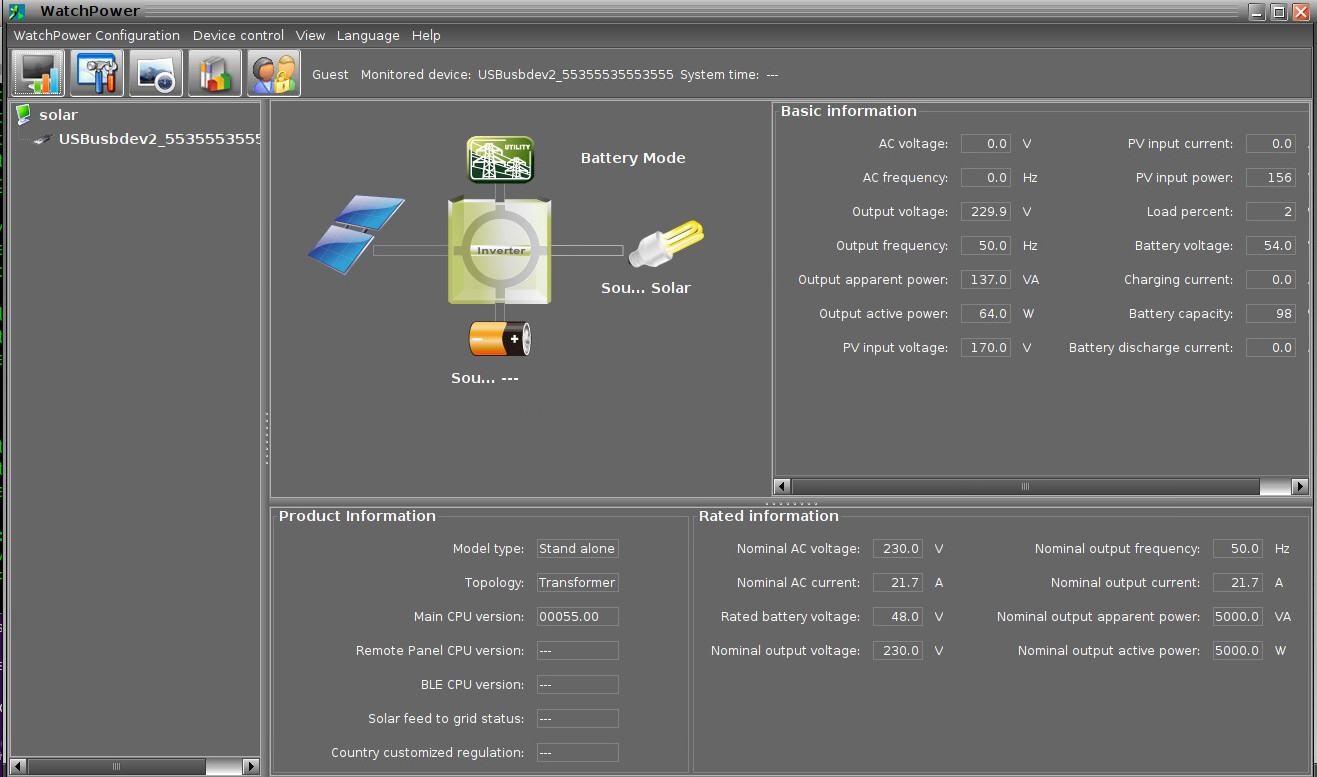
when first running the software, be patient, as it takes at least 30 seconds for it to have all values…
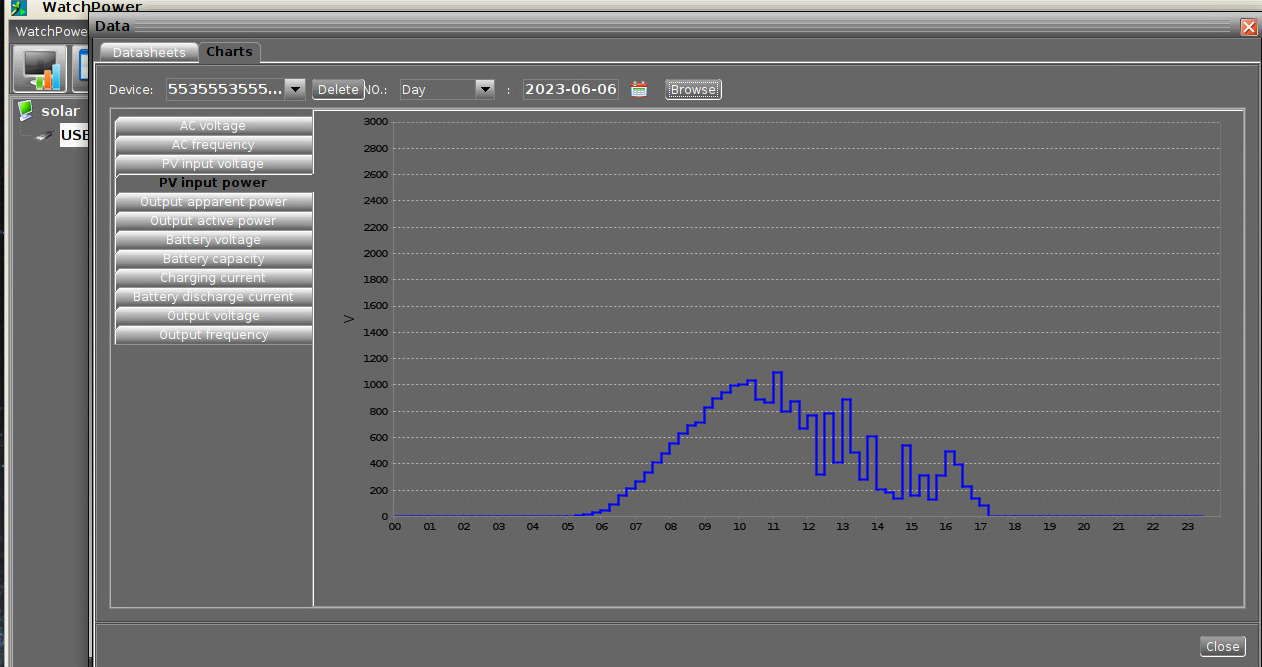
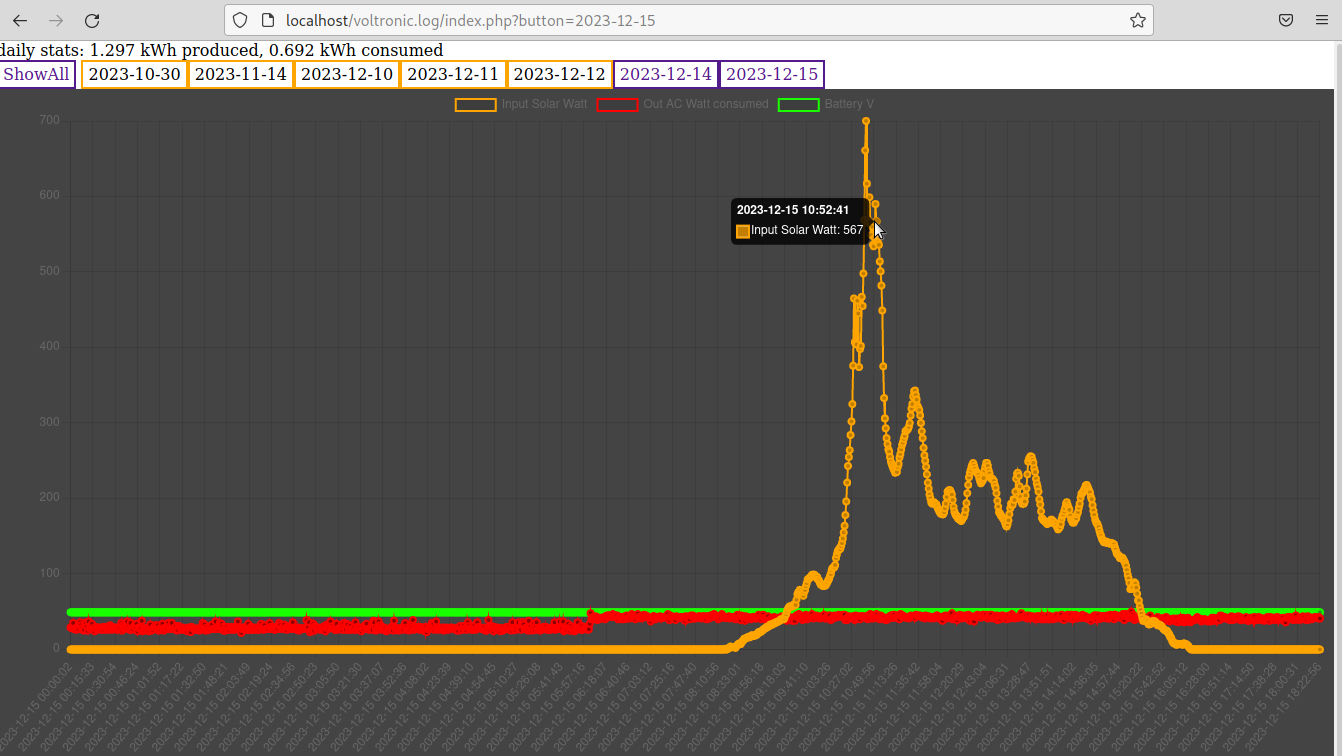
it can do basic chart plotting:
what it can not do: tell the user, how much kWh was produced-used today, last week, last month, last year… (#wtf?)
but luckily there is “Open Source” 😀
- R-Click on the tray icon of WatchPower -> enable the DEBUG CheckBox
- now WatchPower will write log files to /home/user/software/WatchPower/log/debug/
- install git:
-
su - root -
apt update -
apt install git
-
- install Apache2 + PHP web root will be /var/www/html
-
cd /var/www/html -
git clone https://github.com/UltimateSolar/watchpower-voltronic-log-web-charts.git -
mount --bind /home/user/software/WatchPower/log/debug/ /var/www/html/data -
chown -R www-data /var/www/html - open up browser http://192.168.0.XXX (ip of webserver)
- CONGRATZ! VOILA! 😀 FINALLY! WEB INTERFACE TO THE VOLTRONIC MASTERPOWER DATA 😀 (READ ONLY!)
- install git:
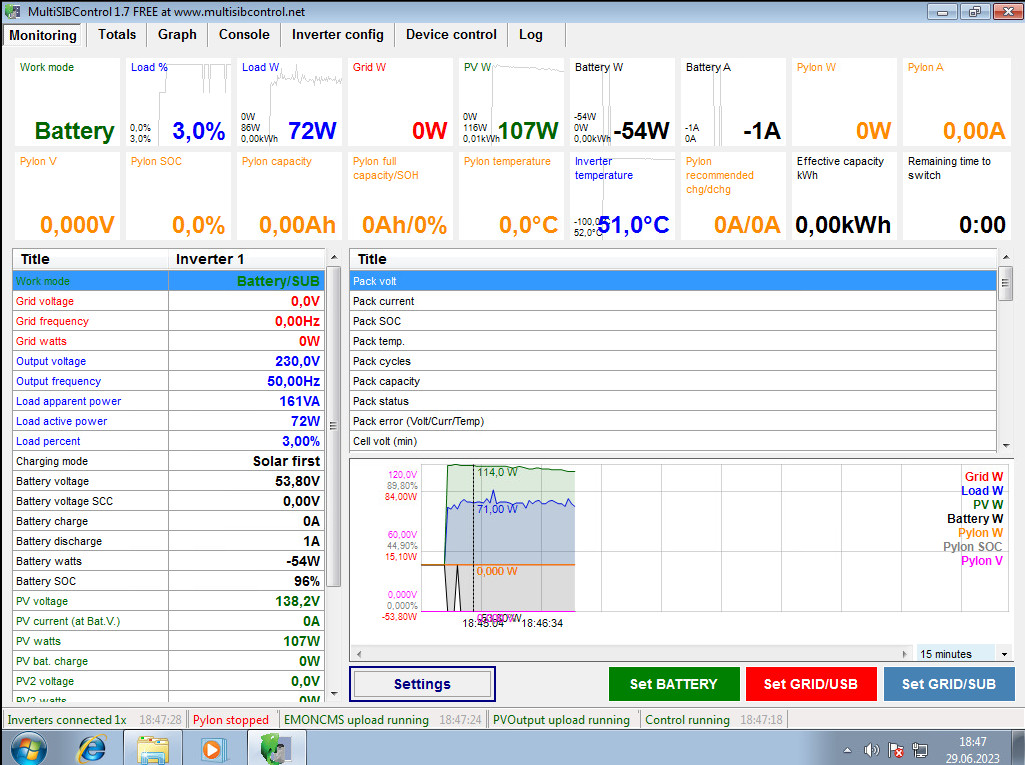
there is an actual alternative software (windows only that supports voltronic and also pylontech (http://www.multisibcontrol.net/)
It is important to use the WatchPower version that came with the inverter, newer versions might fail to function!!!! (#wtf?)
so here is the version that came with the MasterPower PMS 5K-48TOP Off-Grid:
- MasterPower_PMS_5K-48TOP_Off-Grid_CD_Software_installWatchPower_Windows_Linux_ARM.zip
- MasterPower_PMS_5K-48TOP_Off-Grid_CD_Software_installWatchPower_Windows_Linux_ARM.zip.md5sum.txt
- (includes alleged supported version for OSX UNTESTED! X-D)
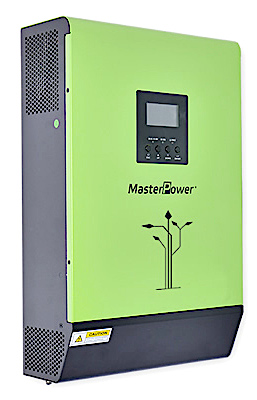
WatchPower is a Java software that runs cross-OS and connects via USB-to-serial-Cable to a MasterPower Axpert PowMr POWLAND SkyMax MF-OMEGA MPP BGH-5KW EASUN STECA KATEK SOLARIX PLI 5000W 48V Solar Solar Hybrid Inverter (many many brands it’s all Taiwan-China-Voltronic company rebranding for marketing purposes)
WARNING! WAS TESTED WITH MasterPower PMS 5K-48TOP Off-Grid VERSION! ALL OTHER VERSIONS UNTESTED!
WARNING! THERE ARE EVIL CHEAP CLONES (CHINA COPIES TAIWAN) OF THE VOLTRONIC PRODUCTS! DO NOT BUY: EASUN, PowMr, PowLand! (they might not work with WatchPower software but might BURN DOWN THE HOUSE)

If the user wants guranteed good quality 100% Voltronic inverters buy them directly from MPPSolar’s online store at https://maximumsolar.online/!
(here a thread explaining this)
install
- load the software on a Debian 12 enabled PC
- start the installer
hostnamectrl; # tested on
Debian GNU/Linux 11 (bullseye)

# plug in the USB to USB cable into the inverter bottom USB port
# dmesg should report something like:
su - root
usermod -a -G dialout username;
# allow non-root user to use serial devices such as ttyUSB0 and COM1
# optional, as the WatchPower.sh script will be run as root anyway
dmesg
[    2.101630] usb 2-1: New USB device found, idVendor=0665, idProduct=5161, bcdDevice= 0.02
[    2.101699] usb 2-1: New USB device strings: Mfr=3, Product=1, SerialNumber=0
[    2.111470] hid: raw HID events driver (C) Jiri Kosina
[    2.120357] usbcore: registered new interface driver usbhid
[    2.120405] usbhid: USB HID core driver
[    2.122314] hid-generic 0003:0665:5161.0001: hiddev0,hidraw0: USB HID v1.11 Device [HID 0665:5161] on usb-0000:00:14.0-1/input0
[    2.136531] PM: Image not found (code -22)
[    2.230243] usb 2-4: new high-speed USB device number 3 using xhci_hcd

lsusb
Bus 002 Device 002: ID 0665:5161 Cypress Semiconductor USB to Serial <- that's the one

vim /scripts/WatchPower.sh

#!/bin/bash
# start as root without sudo
export DISPLAY=':0.0'
cp -v /home/user/.Xauthority /root/.Xauthority
/home/user/WatchPower/WatchPower
# enable sudo for username: user # add this line: user ALL=(ALL:ALL) NOPASSWD:/home/user/software/WatchPower/WatchPower # AT THE VERY END (YES IT HAS TO BE THE VERY END) vim /etc/sudoers # reboot system to apply changes # now two possibilities to start WatchPower # via sudo sudo /home/user/software/WatchPower/WatchPower # as root su - root /scripts/WatchPower.sh # after a short time the gui should come up # and start scanning USB and COM ports for possible connected inverters # after max 30 sec it should start displaying the first data # if that worked # in order to make WatchPower auto start on boot use sudo (creditz) # with the default MATE startup tool :D# WatchPower will automatically-constantly scan ttyS0 / ttyS1 for input # it is possible to turn on debug mode, when the program is running and r-click on the tray icon
# when that is on # the debug log will be here cd /home/user/WatchPower/log/debug # it is interesting to watch the commands via this command find /home/user/WatchPower/log/* -type f \( -name "*" \) ! -path '*.gz*' -exec tail -n0 -f "$file" {} + # sample output ==> /home/user/WatchPower/log/debug/2023-06-29 USB-QVFW.log <== [2023-06-29 20:49:26](VERFW:00055.00 <- firmware of the device ==> /home/user/WatchPower/log/debug/2023-06-29 USB-QVFW2.log <== [2023-06-29 20:49:27](VERFW2:00098.24 <- firmware of the device ==> /home/user/WatchPower/log/debug/2023-06-29 USB-QBEQI.log <== [2023-06-29 20:52:54](0 060 030 060 030 58.40 000 120 0 0000 ==> /home/user/WatchPower/log/debug/2023-06-29 Serial-QPI.log <== [2023-06-29 20:52:53](0 060 030 060 030 58.40 000 120 0 0000 ==> /home/user/WatchPower/log/debug/2023-06-29 USB-QPIRI.log <== [2023-06-29 20:52:54](230.0 21.7 230.0 50.0 21.7 5000 5000 48.0 46.0 44.0 56.0 54.0 2 030 060 0 1 1 9 01 0 0 54.0 0 0 000 ==> /home/user/WatchPower/log/debug/2023-06-29 Serial-QPI.log <== [2023-06-29 20:52:54](230.0 21.7 230.0 50.0 21.7 5000 5000 48.0 46.0 44.0 56.0 54.0 2 030 060 0 1 1 9 01 0 0 54.0 0 0 000 [2023-06-29 20:52:55](00000100000000000000000000000000 ==> /home/user/WatchPower/log/debug/2023-06-29 USB-QPIWS.log <== [2023-06-29 20:52:55](00000100000000000000000000000000 ==> /home/user/WatchPower/log/debug/2023-06-27 USB-QT.log <== [2023-06-27 12:52:33](NAK <- no idea, "Not Acknowledged"? (device did not understand the command?) ==> /home/user/WatchPower/log/debug/2023-06-27 USB-QPIGS.log <== [2023-06-27 12:52:35](000.0 00.0 230.2 50.0 0161 0129 003 422 53.90 000 097 0047 0000 167.2 00.00 00001 00010010 00 00 00215 010 <- echo '(000.0 00.0 230.2 50.0 0161 0129 003 422 53.90 000 097 0047 0000 167.2 00.00 00001 00010010 00 00 00215 010' | wc -c 108 ==> /home/user/WatchPower/log/debug/2023-06-29 USB-QPIRI.log <== [2023-06-29 20:43:12](230.0 21.7 230.0 50.0 21.7 5000 5000 48.0 46.0 44.0 56.0 54.0 2 030 060 0 1 1 9 01 0 0 54.0 0 0 000 echo '(230.0 21.7 230.0 50.0 21.7 5000 5000 48.0 46.0 44.0 56.0 54.0 2 030 060 0 1 1 9 01 0 0 54.0 0 0 000' | wc -c 101 ==> /home/user/WatchPower/log/debug/2023-06-29 USB-QPIWS.log <== [2023-06-29 20:48:03](00000100000000000000000000000000 echo '(00000100000000000000000000000000' | wc -c 34 + 1 start + 1 stop bit = 36 ? cat inverter.conf # seems to work when serial (RJ45) connected to com1 device=/dev/ttyS0 # device=/dev/ttyUSB0 # device=/dev/hidraw4 run_interval=120 amperage_factor=1.0 watt_factor=1.01 qpiri=103 qpiws=36 qmod=5 qpigs=110 ...
how to build the C binaries to communicate directly via terminal without java
creditz go to Skyboo 😀 thanks for your open source!
problem: was unable to get the right parameters (?) to get it to work
imho it should not be like this, that the user has to manually find the right parameters for one’s inverter-firmware-combination.
rather the program should try to “detect” what inverter-firmware combination speaks what protocol and automatically extract the data correctly 🙁
here it would be VERY VERY good if vendors such as Voltronic and MPPSolar start ACTIVELY developing open source tools based on skyboo’s work. (but it seems they don’t care 🙁
# install requirements su - root apt update; apt install cmake git build-essential; # log off root Ctrl+D # check version installed cmake --version cmake version 3.18.4 CMake suite maintained and supported by Kitware (kitware.com/cmake). # use https instead of ssh git clone https://github.com/manio/skymax-demo.git # go into newly created subdir cd skymax-demo # prepare build cmake . # output ought to be like: -- The C compiler identification is GNU 10.2.1 -- The CXX compiler identification is GNU 10.2.1 -- Detecting C compiler ABI info -- Detecting C compiler ABI info - done -- Check for working C compiler: /usr/bin/cc - skipped -- Detecting C compile features -- Detecting C compile features - done -- Detecting CXX compiler ABI info -- Detecting CXX compiler ABI info - done -- Check for working CXX compiler: /usr/bin/c++ - skipped -- Detecting CXX compile features -- Detecting CXX compile features - done -- Configuring done -- Generating done -- Build files have been written to: /home/user/skymax-demo # build make Scanning dependencies of target inverter_poller [ 20%] Building CXX object CMakeFiles/inverter_poller.dir/inputparser.cpp.o [ 40%] Building CXX object CMakeFiles/inverter_poller.dir/inverter.cpp.o /home/user/path/where/src/is/skymax-demo/inverter.cpp: In member function ‘bool cInverter::query(const char*, int)’: /home/user/path/where/src/is/skymax-demo/inverter.cpp:114:32: warning: pointer of type ‘void *’ used in arithmetic [-Wpointer-arith] 114 | n = read(fd, (void*)buf+i, replysize-i); | ~~~~~~~~~~^~ [ 60%] Building CXX object CMakeFiles/inverter_poller.dir/main.cpp.o [ 80%] Building CXX object CMakeFiles/inverter_poller.dir/tools.cpp.o [100%] Linking CXX executable inverter_poller [100%] Built target inverter_poller # run the binary program ./inverter_poller -h USAGE: ./inverter_poller [-r], [-h | --help], [-1 | --run-once] SUPPORTED ARGUMENTS: -r TX 'raw' command to the inverter -h | --help This Help Message -1 | --run-once Runs one iteration on the inverter, and then exits -d Additional debugging RAW COMMAND EXAMPLES (see protocol manual for complete list): Set output source priority POP00 (Utility first) POP01 (Solar first) POP02 (SBU) Set charger priority PCP00 (Utility first) PCP01 (Solar first) PCP02 (Solar and utility) PCP03 (Solar only) Set other commands PEa / PDa (Enable/disable buzzer) PEb / PDb (Enable/disable overload bypass) PEj / PDj (Enable/disable power saving) PEu / PDu (Enable/disable overload restart) PEx / PDx (Enable/disable backlight) # The code requires your inverter to be connected either via USB or RS323, and can be configured in the inverter.conf file... cat inverter.conf # Basic configuration options for the actual inverter polling process... # The device to read from... # Use: /dev/ttyS0 if you have a serial device, # /dev/ttyUSB0 if a USB<>Serial, # /dev/hidraw0 if you're connecting via the USB port on the inverter. device=/dev/ttyS0 # How many times per hour is the program going to run... # This is used to calculate the PV & Load Watt Hours between runs... # If unsure, leave as default - it will run every minute... # (120 = every 30 seconds)... run_interval=120 # This allows you to modify the amperage in case the inverter is giving an incorrect # reading compared to measurement tools. Normally this will remain '1' amperage_factor=1.0 # This allos you to modify the wattage in case the inverter is giving an incorrect # reading compared to measurement tools. Normally this will remain '1' watt_factor=1.01
hint: “several inverters seem to return a different response depending on the firmware version they are running” (src)
while running the WatchPower software this returned some results 😀
su - root
stty -F /dev/ttyS0 2400 raw; # set baud rate of com1
# if lucky listen to output on com1 should print something
tail -f /dev/ttyS0
(000.0 0.0 229.9 50.0 060 0079 003 40553.90 000 097 052 0000 140.3 0.00 00000 0001010 00 00 00157 10\
(000.0 0.0 230.0 50.0 061 0080 003 40053.90 000 097 052 0000 140.7 0.00 00001 00010 00149 010�52 010�j
000.0 0.0 229. 50.0 060 0073003 39953.90 00 097 052 0000139.2 0.00 0000 0001010 00 0 00123 10�0�:000�33 010��000000000000��
(PI30�5355535552�.0 061 0071003 39953.80 00 096 052 0000140.8 0.00 0001 0001010 00 00 00121 10i�00000000000000000��
(000.0 00.0 230.0 50.0 0138 0066 002 399 53.80 000 096 0052 0000 138.1 00.00 00001 00010010 00 00 00114 010
(000.0 00.0 230.0 50.0 0161 0082 003 397 53.80 000 096 0052 0000 139.8 00.00 00001 00010010 00 00 00114 010�P
(000.0 00.0 230.2 50.0 0161 0069 003 401 53.80 000 096 0052 0000 142.6 00.00 00001 00010010 00 00 00111 0107�
(000.0 00.0 230.2 50.0 0161 0082 003 378 53.80 000 096 0051 0000 140.2 00.00 00001 00010010 00 00 00105 010��   >
...
so as long as WatchPower is running, the inverter definately outputs data on /dev/ttyS0 (com1)
capturing the ttyS0 (com1 port) output
this command allows that:
su - root
apt install socat
socat /dev/ttyS0,raw,b2400,echo=0 SYSTEM:'tee in.txt |socat - "PTY,link=/tmp/ttyV0,raw,echo=0,waitslave" |tee out.txt'
this was captured: MasterPower PMS 5K-48TOP Off-Grid_com1_socat_in.txt
this is the manpage: socat.man.txt
socat can also set the baudrate:
# view all available baud rates
socat -hh |grep b[1-9]
      b1000000	groups=TERMIOS	phase=FD	type=CONST
      b110	groups=TERMIOS	phase=FD	type=CONST
      b115200	groups=TERMIOS	phase=FD	type=CONST
      b1152000	groups=TERMIOS	phase=FD	type=CONST
      b1200	groups=TERMIOS	phase=FD	type=CONST
      b134	groups=TERMIOS	phase=FD	type=CONST
      b150	groups=TERMIOS	phase=FD	type=CONST
...

socat -hh |grep b[1-9]|grep 2400
b2400 groups=TERMIOS phase=FD type=CONST
CRC?
src (a 600 page monster thread) of this src
INT16U cal_crc_half(INT8U far *pin, INT8U len)
{
     INT16U crc;
     INT8U da;
     INT8U far *ptr;
     INT8U bCRCHign;
    INT8U bCRCLow;
     INT16U crc_ta[16]=
     {
          0x0000,0x1021,0x2042,0x3063,0x4084,0x50a5,0x60c6,0x70e7,
          0x8108,0x9129,0xa14a,0xb16b,0xc18c,0xd1ad,0xe1ce,0xf1ef
     };
     ptr=pin;
     crc=0;
     while(len--!=0)
     {
          da=((INT8U)(crc>>8))>>4;
          crc<<=4; crc^=crc_ta[da^(*ptr>>4)];
          da=((INT8U)(crc>>8))>>4;
          crc<<=4; crc^=crc_ta[da^(*ptr&0x0f)]; ptr++; } bCRCLow = crc; bCRCHign= (INT8U)(crc>>8);
     if(bCRCLow==0x28||bCRCLow==0x0d||bCRCLow==0x0a)
    {
         bCRCLow++;
    }
    if(bCRCHign==0x28||bCRCHign==0x0d||bCRCHign==0x0a)
    {
          bCRCHign++;
    }
    crc = ((INT16U)bCRCHign)<<8;
    crc += bCRCLow;
     return(crc);
}
how to heat LiFePo4 in winter the smart way?
Making “heat” from precious solar generated electricity is a bit of a shame
(AVOID DALY BMS, as it is also data privacy wise a catastrophe (wants to know the user’s GPS position in order to function #wtf?) spend a bit more on JK BMS as it also includes (!!!) a heating function!)
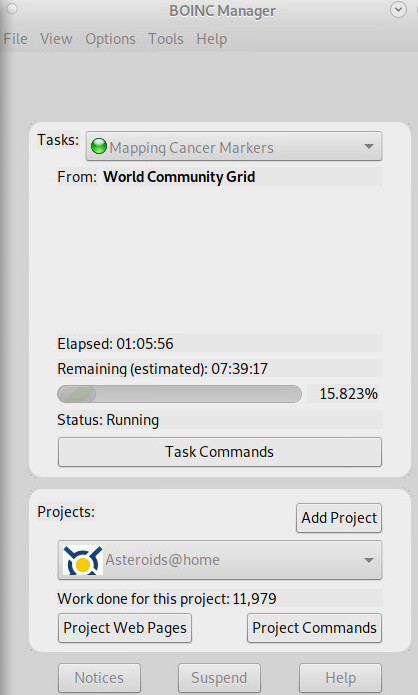
why not use the waste heat of multiple CPUs crunching to do that? 😀
So the energy waste is at least put to some good use?
It could work like this: there is the “master” computer, monitoring the temperature of the LiFePo4 battery pack for example with the said-to-work-well-PC+TEMPER2+Sensor+USB+Thermometer
if it drops below +10°C, it sends a wake-up (WOL) command to another (1x, 2x, 3x) SoC to power up and start number crunching 😀 voila! battery heated! no energy wasted 😀
liked this article?
- only together we can create a truly free world
- plz support dwaves to keep it up & running!
- (yes the info on the internet is (mostly) free but beer is still not free (still have to work on that))
- really really hate advertisement
- contribute: whenever a solution was found, blog about it for others to find!
- talk about, recommend & link to this blog and articles
- thanks to all who contribute!