![]()
- BACKGROUND INFO: how does kvm use qemu?
- KVM (Kernel-based Virtual Machine) is a virtualization solution for Linux on x86 hardware.
- It allows running multiple virtual machines (VMs) on a GNU Linux host by leveraging hardware virtualization extensions such as Intel VT-x or AMD-V.
- KVM provides the kernel module that enables the host’s kernel to act as a hypervisor.
- QEMU (Quick Emulator) is a generic and open-source machine emulator and virtualizer.
- It can emulate various hardware platforms and supports running guest operating systems.
- QEMU itself can perform full system emulation, meaning it can emulate the entire hardware environment of a target machine, including CPU, memory, storage, and peripherals.
- KVM uses QEMU to provide device emulation for the virtual machines it manages.
- When the user creates a VM using KVM, QEMU is responsible for emulating the virtual hardware that the VM interacts with, such as virtual CPUs, disk drives, network interfaces, and other devices. This allows KVM to focus on the management and scheduling of the VMs while delegating the low-level hardware emulation tasks to QEMU.
- In summary, KVM and QEMU work together to provide a complete virtualization solution: KVM provides the hypervisor functionality, managing the VMs and leveraging hardware virtualization features, while QEMU handles the emulation of virtual hardware for the VMs. (humanoid enhanced answer of ChatGPT 3.5)
- KVM (Kernel-based Virtual Machine) is a virtualization solution for Linux on x86 hardware.
- IN CONTRAST TO iESXI
- KVM RUNS ON ANY HARDWARE THAT GNU LINUX RUNS ON (NOT LIMITED TO DELL AND A HAND FULL OF SUPERMICRO SRV)
- WAY FASTER THAN ESXI
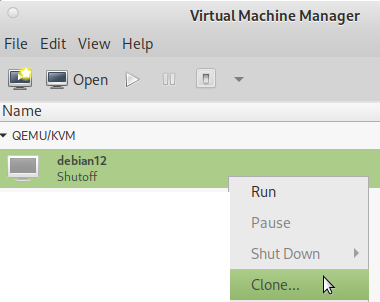
- EASY VM MANAGEMENT: CLONING A VM IS A EASY AS:
virt-clone --original debian12 --name debian12-clone --file /where/to/store/debian12-clone.qcow2- NO COMPLICATED “HACKS” REQUIRED X-D (ALMOST FELL OFF THE CHAIR, THAT THE WIDELY USED ESXI HAS NO SUCH EASY FUNCTIONALITY? IF COMPANIES WERE SMART THEY WOULD ALL MIGRATE TO KVM) or via GUI:
KVM vs QEMU
- qemu is userland (typ2) virtualization: can emulate CPUs via dynamic binary translation (DBT) allowing code written for a given processor to be executed on another (i.e ARM on x86, or PPC on ARM)
- kvm
- is a kernel module
- can not emulate other CPU-types
- it uses Intel VT or AMD-V) directly assign-map a real cpu to a vm’s vCPU, without translation 100% the speed of the hardware
hostnamectl; # tested on Static hostname: hpServerG6 Operating System: Debian GNU/Linux 10 (buster) Kernel: Linux 4.19.0-12-amd64 Architecture: x86-64 su - root; apt update; apt install qemu-kvm libvirt-clients libvirt-daemon-system bridge-utils virtinst libvirt-daemon virt-manager
# give non-root user kvm access (it might be required for that user to re-login or reboot pc) # (still getting error: failed to get domain 'vmname') usermod -aG kvm user usermod -aG libvirt user# auto starting the default nat network virsh net-start default Network default started virsh net-autostart default Network default marked as autostarted
now reboot the system to make changes effective
connect securely to remote server and start the vm management gui 🙂
remote server:
now comes the fancy part (that only GNU Linux can do with ease):
hostnamectl; # tested with client
  Operating System: Debian GNU/Linux 10 (buster)
            Kernel: Linux 4.19.0-17-amd64
      Architecture: x86-64

hostnamectl; # tested with server
   Static hostname: SuperStorageSrv1
  Operating System: Debian GNU/Linux 11 (bullseye)
            Kernel: Linux 5.10.0-8-amd64
      Architecture: x86-64

# if problems errors occur, they should be visible here
tail -f /var/log/syslog
# or here
tail -f /var/log/libvirt/qemu/*.log
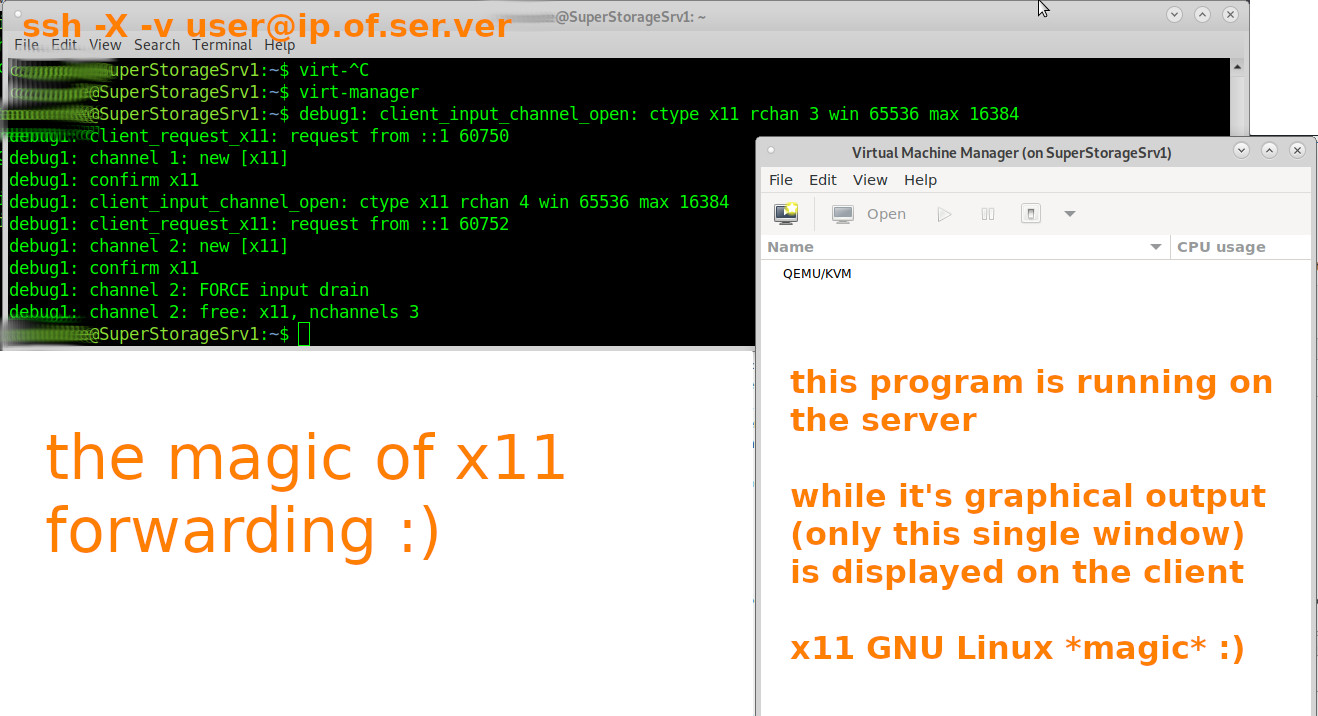
# logout of the sever
Ctrl+D
# log back in with ssh -X (x11 forwarding)
ssh -X -v user@ip.of.ser.ver
# then start
virt-manager
# the output
- ssh-logged in and when trying to start a x11 application, getting the error “Unable to init server: Could not connect: Connection refused”?
- try ssh-re-login with:
-
ssh -v -X username@ip.of.server - it simply works (keep it that way X-D)
- no need to setup a vpn to have encrypted tunneled remote desktop connection
- no need to run a full-blown (Gnome or other) desktop software on the server
- yes the output is not exactly fast X-D (no jpg-screen compression) but it works
- if more output speed is needed, checkout xpra
local server:
if the user-admin is on a local server, without a gui, there is no virt-manager
but kvm-qemu is nicely scriptable via bash-terminal 🙂
if there is a (as minimal as possible) gui on the server:
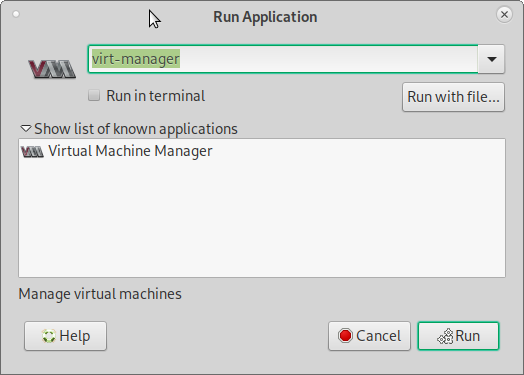
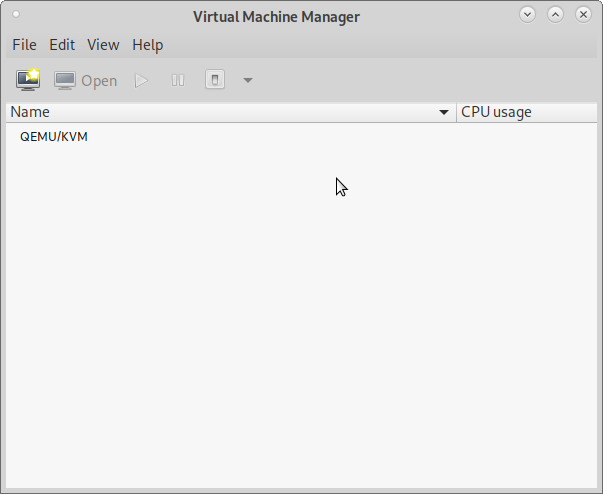
now under MATE hit Alt+F2 and type “virt”
to bring up the virt manager gui (root is required)
also: always go with the kvm native harddisk format (not vmware format, prone to trouble)
per default files of the vm are stored here
/etc/libvirt/qemu/vmname.xml; # config file
/var/log/libvirt/qemu/vmname.log; # log
/var/lib/libvirt/images/vmname.qcow2; # harddisk image
change where vms are stored
would prefer a path like
/home/user/vms/kvm
virt-manager as root “emulator may not have search permissions for the path”

this is because AppArmor or SELinux are blocking kvm qemu, to access files.
when running virt-manager as non-root, it will not be able to “correct this now”.
so try this trick:
vim /scripts/virt-manager.sh
# start virt-manager as root but with x11 gui output
# replace user with the user's default non-root user name
export DISPLAY=':0.0'
cp -v /home/user/.Xauthority /root/.Xauthority
virt-manager

# now run this as root
su - root
/scripts/virt-manager.sh
might not be optimal, but this way it is able to work around the problem
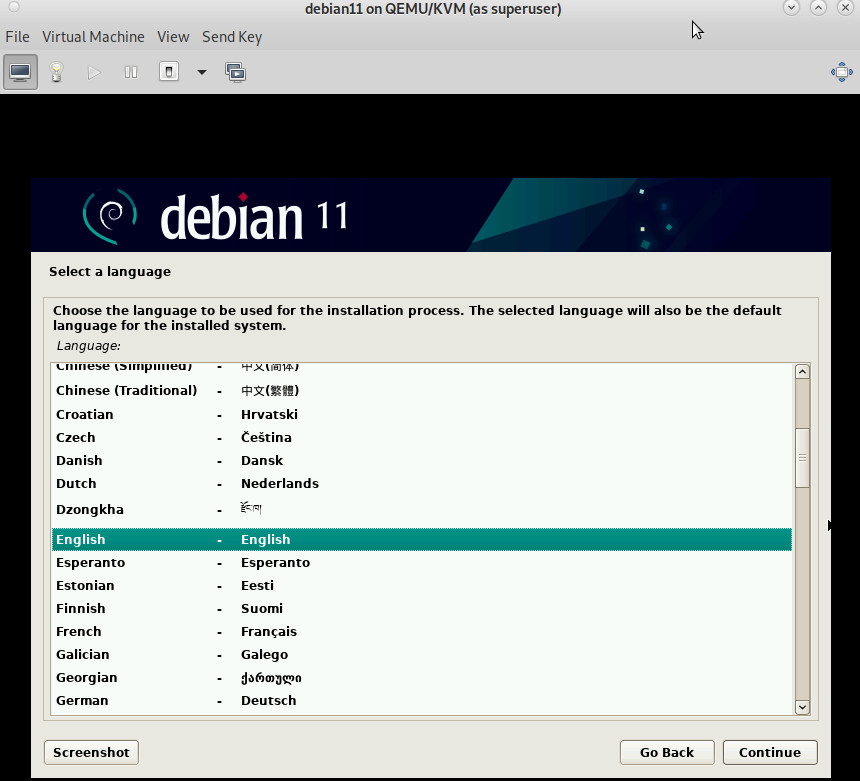
debian-11 guest vm running on debian-11 host
it might also help to modify this config file:
vim /etc/libvirt/qemu.conf

# The default security driver is SELinux. If SELinux is disabled
# on the host, then the security driver will automatically disable
# itself. If you wish to disable QEMU SELinux security driver while
# leaving SELinux enabled for the host in general, then set this
# to 'none' instead. It's also possible to use more than one security
# driver at the same time, for this use a list of names separated by
# comma and delimited by square brackets. For example:
#
#       security_driver = [ "selinux", "apparmor" ]
#
# Notes: The DAC security driver is always enabled; as a result, the
# value of security_driver cannot contain "dac".  The value "none" is
# a special value; security_driver can be set to that value in
# isolation, but it cannot appear in a list of drivers.
#
security_driver = "apparmor"


# then restart the service
systemctl restart libvirtd.service
basic virsh commands
virsh nodeinfo; # info about the system CPU model: x86_64 CPU(s): 4 CPU frequency: 1903 MHz CPU socket(s): 1 Core(s) per socket: 2 Thread(s) per core: 2 NUMA cell(s): 1 Memory size: 7831316 KiB virsh list --all; # list all (running and off vms) # list all vms and their status, refresh every 1sec # run this as non-root but also as root, the output might be different # e.g. vms that are off might only show up when run as root while true; do virsh list --all; sleep 1; clear; done # now let's create a virtual harddisk cd /home/user/vms/kvm # create a new thin(!)provisioned harddisk, a bit slower, but way less harddisk space used qemu-img create -f qcow2 name-of-harddisk-image.qcow2 64G # do not forget to manually select it during setupvirsh start vmname; # start vm virsh reboot vmname; # reboot vm virsh suspend vmname; # pause vm virsh resume vmname; # resume paused virsh shutdown vmname; # shutdown vm like power button apci virsh destroy vmname; # forcefull poweroff vm virsh autostart vmname; # set vmname to autostart when host system starts virsh autostart --disable vmname; # disable autostart for vmname # shutdown all vms for i in `sudo virsh list | grep running | awk '{print $2}'` do sudo virsh shutdown $i done # delete remove vmname (cleanly) # including its storage columes virsh destroy vmname 2> /dev/null virsh undefine vmname virsh pool-refresh default virsh vol-delete --pool default vmname.qcow2 # take snapshot virsh snapshot-create-as --domain vmname --name "snapshot-name" --description "description" # use the current date-and-time for as snapshot-name virsh snapshot-create-as --domain vmname --name "$(date '+%Y-%m-%d-%H-%M')" --description "description" # same +seconds virsh snapshot-create-as --domain vmname --name "$(date '+%Y-%m-%d-%H-%M-%S')" --description "description" # list all snapshots of vmname virsh snapshot-list --domain vmname # revert to snapshot virsh snapshot-revert vmname snapshot-name # rename a vm virsh domrename vmname newvmname # resize an kvm harddisk file by 1024GBytes (1TB) qemu-img resize /path/to/kvm-harddisk-file.qcow2 +1024G # neat script to start any arbitrary vm # and immediately connect to it's desktop # modify the user (is the default user that is running the desktop/x11/lightdm) vim /home/user/scripts/kvm/start.sh #!/bin/bash VMNAME=$1 echo "=== starting $VMNAME ===" # the below is optional, but might be usefull # in some scenarios where the user want's # a guranteed-to-work state # echo "=== revert to working snapshot ===" # cvirsh destroy $VMNAME # cvirsh snapshot-revert $VMNAME works virsh start $VMNAME export DISPLAY=':0.0' /usr/bin/cp -fv /home/user/.Xauthority /root/.Xauthority virt-viewer $VMNAME # as soon as the viewer window is closed either: # destroy (forecfull power off) # virsh destroy $VMNAME # or graceful shutdown # virsh shutdown $VMNAME # usage example # (under Debian11 have to run the script as root # the viewer run's as root then, but not the vm (user: libvirt-q) /home/user/scripts/kvm/start.sh vmname
gpu pass through
kvm is used by many companies such as https://www.hetzner.com/
or proxmox:
not many virtualization technologies can do that: https://dwaves.de/2017/12/23/kvm-gpu-graphic-card-pass-through-windows-games-on-linux/
related articles:
https://dwaves.de/2021/08/12/gnu-linux-how-to-kvm-qemu-shutdown-all-vms-start-all-vms-with-keyword-in-name-snapshot-all-vms/
for better GNU Linux and Windows guest vm integration check out
https://www.packetcoders.io/what-is-the-difference-between-qemu-and-kvm/
shared clipboard, GNU Linux auto resize screen:
https://dwaves.de/2021/09/15/gnu-linux-debian-10-11-ubuntu-kvm-qemu-virtualization-host-disk-bench-windows-7-64bit-vm-guest-only-32bit-works-unable-to-init-server-could-not-connect-connection-refused/
how to make kvm-vms take less disk space:
https://dwaves.de/2021/08/01/how-to-gnu-linux-thin-provisioning-kvm-virtual-machines-with-virt-manager-bigger-than-physical-virtual-harddisks/
have a server with multiple GPUs? asign them dedicated to a vm! X-D
KVM QEMU GPU Graphic Card Pass Through – Windows Games on GNU Linux
esxi inside kvm-qemu? holy crap! yes! kvm can do that 🙂
networking: VMs in NAT mode should work by now 🙂 (thanks all involved!)
https://dwaves.de/2021/08/30/gnu-linux-how-to-kvm-qemu-port-forwarding-how-to-forward-host-port-to-guest-vm-in-nat-networking-mode/
Links & Credits:
https://github.com/andreabolognani https://kiyuko.org/home
https://www.linuxtechi.com/install-configure-kvm-debian-10-buster/ (thanks despite insane amount of ads) X-D (block this waste in Firefox with uBlock)
https://computingforgeeks.com/virsh-commands-cheatsheet/
liked this article?
- only together we can create a truly free world
- plz support dwaves to keep it up & running!
- (yes the info on the internet is (mostly) free but beer is still not free (still have to work on that))
- really really hate advertisement
- contribute: whenever a solution was found, blog about it for others to find!
- talk about, recommend & link to this blog and articles
- thanks to all who contribute!