(checkout vnc section of this article)
if one gets problem connecting with error message: “x11vnc error: socket: Address family not supported by protocol (97)”
then probably ipv6 needs to be disabled on client (and even if it is not used, seems like the server “requires” it)
vim /etc/default/grub
# find
GRUB_CMDLINE_LINUX="ipv6.disable=1"
# and comment it out or remove this
# GRUB_CMDLINE_LINUX="ipv6.disable=1"
# then run (tested with: debian8/ubuntu)
update-grub
# RedHat/Fedora/CentOS7 update grub config and menu
grub2-mkconfig
grub2-mkconfig -o /boot/grub2/grub.cfg
# and restart and you should be able to connect
reboot
it is wise to, monitor all logs while one is trying to get vnc server working… it can reveal a lot what is going on and wrong.
forget about Xvnc and tigervnc…

x11vnc is probably what the user want: https://www.digitalocean.com/community/tutorials/how-to-install-and-configure-vnc-remote-access-for-the-gnome-desktop-on-centos-7
it cost me some time and concentration to figure this out…
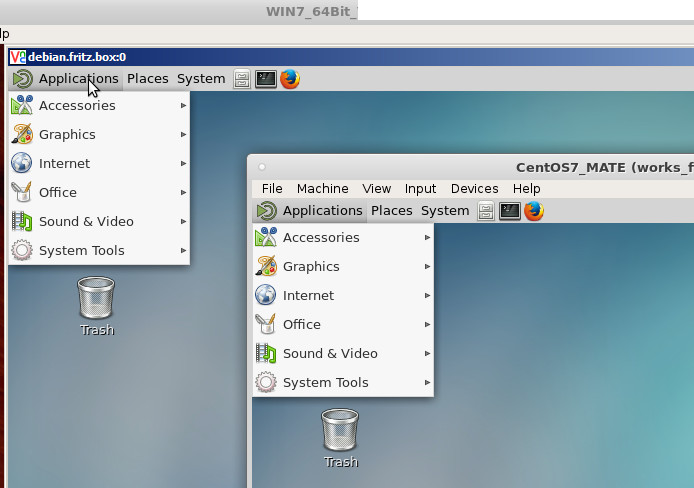
what user probably wants is “screen sharing” – e.g. SEE THE SAME SCREEN as if user were sitting at the monitor of the actual machine.
tightvnc client accessing screen shared by centos7 x11vnc – same desktop vnc also accessible from windows ssh tunneled via putty 0.65:
requirements: make sure user can ssh into user’s machine with a standard non-root user.
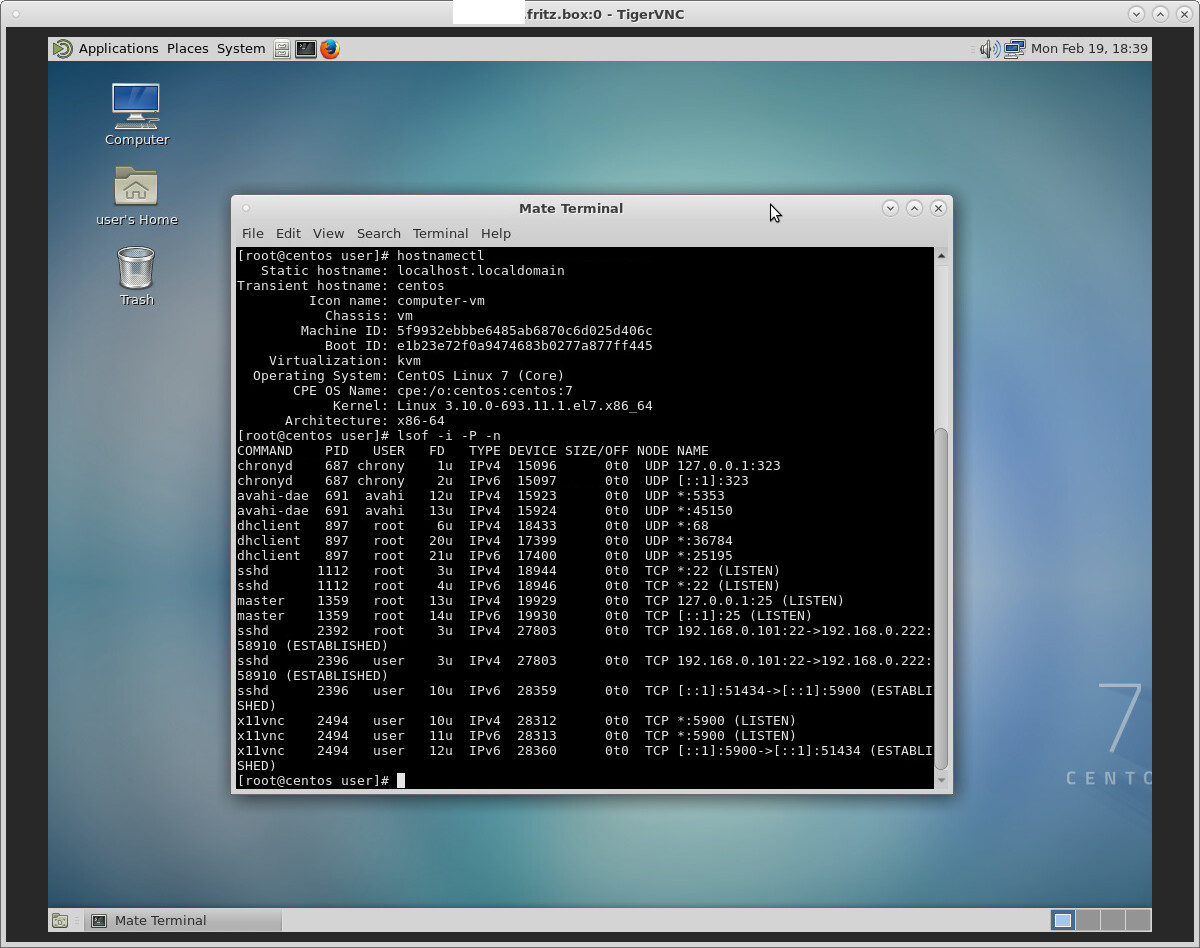
hostnamectl; # tested with
  Operating System: CentOS Linux 7 (Core)
       CPE OS Name: cpe:/o:centos:centos:7
            Kernel: Linux 3.10.0-693.11.1.el7.x86_64
      Architecture: x86-64
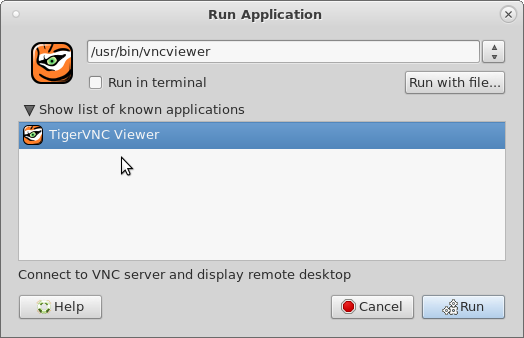
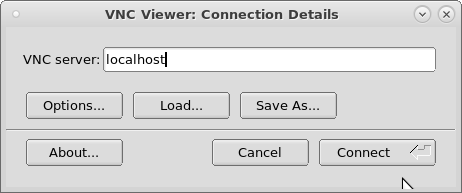
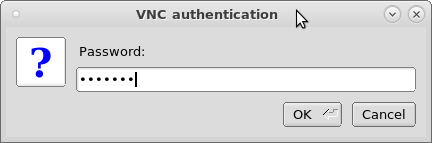
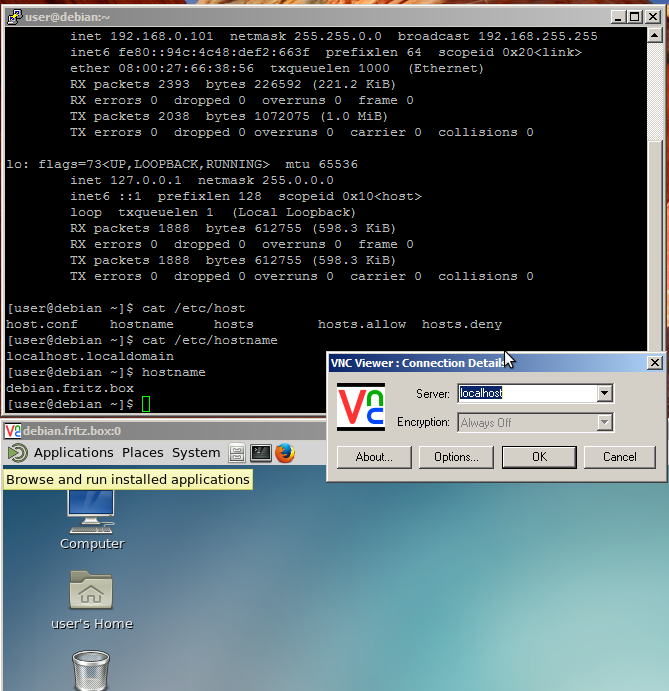
# on the client (the pc running vnc client connecting to another pc (vncserver))
su - root
apt update
apt install vncviewer; # older debian
apt install tigervnc-viewer; # newer debian (12)
yum install vncviewer; # centos

# setup vnc server (x11vnc) on the "server" (the machine that one want's to see the desktop of)
ssh -v user@192.168.0.101
su - root
apt udpate
apt install x11vnc
Ctrl+D # log off root
x11vnc -storepasswd; # generate a per user password file
Enter VNC password: (give it a simple password less than 8 simple chars)
Verify password:
Write password to /home/user/.vnc/passwd? [y]/n y
Password written to: /home/user/.vnc/passwd

# start x11vnc server script
# the user can find out the display number-adress
# by opening a non-root-terminal on the desktop and type
echo $DISPLAY

vim /scripts/vnc_server.sh
#!/bin/bash
# define resolution server-side
export DISPLAY=':0.0'
xrandr --fb 1600x900
x11vnc -display :0 -auth .Xauthority -rfbauth /home/user/.vnc/passwd -forever

# if one is using MATE Gnome2, one can place the line above into autostart applications
# -forever = do not quit on vnc client disconnect = keep running

###############################################################
#@@@@@@@@@@@@@@@@@@@@@@@@@@@@@@@@@@@@@@@@@@@@@@@@@@@@@@@@@@@@@#
#@                                                           @#
#@  **  WARNING  **  WARNING  **  WARNING  **  WARNING  **   @#
#@                                                           @#
#@        USER IS RUNNING X11VNC WITHOUT A PASSWORD!!        @#
#@                                                           @#
#@  This means anyone with network access to this computer   @#
#@  may be able to view and control user's desktop.          @#
#@                                                           @#
#@ >> If user did not mean to do this Press CTRL-C now!! <<< @#
#@                                                           @#
#@@@@@@@@@@@@@@@@@@@@@@@@@@@@@@@@@@@@@@@@@@@@@@@@@@@@@@@@@@@@@#
#@                                                           @#
#@  User can create an x11vnc password file by running:      @#
#@                                                           @#
#@       x11vnc -storepasswd password /path/to/passfile      @#
#@  or   x11vnc -storepasswd /path/to/passfile               @#
#@  or   x11vnc -storepasswd                                 @#
#@                                                           @#
#@  (the last one will use ~/.vnc/passwd)                    @#
#@                                                           @#
#@  and then starting x11vnc via:                            @#
#@                                                           @#
#@      x11vnc -rfbauth /path/to/passfile                    @#
#@                                                           @#
#@  an existing ~/.vnc/passwd file from another VNC          @#
#@  application will work fine too.                          @#
#@                                                           @#
#@  User can also use the -passwdfile or -passwd options.    @#
#@  (note -passwd is unsafe if local users are not trusted)  @#
#@                                                           @#
#@  Make sure any -rfbauth and -passwdfile password files    @#
#@  cannot be read by untrusted users.                       @#
#@                                                           @#
#@  Use x11vnc -usepw to automatically use user's            @#
#@  ~/.vnc/passwd or ~/.vnc/passwdfile password files.       @#
#@  (and prompt user to create ~/.vnc/passwd if neither       @#
#@  file exists.)  Under -usepw, x11vnc will exit if it      @#
#@  cannot find a password to use.                           @#
#@                                                           @#
#@                                                           @#
#@  Even with a password, the subsequent VNC traffic is      @#
#@  sent in the clear.  Consider tunnelling via ssh(1):      @#
#@                                                           @#
#@    http://www.karlrunge.com/x11vnc/#tunnelling            @#
#@                                                           @#
#@  Or using the x11vnc SSL options: -ssl and -stunnel       @#
#@                                                           @#
#@  Please Read the documention for more info about          @#
#@  passwords, security, and encryption.                     @#
#@                                                           @#
#@    http://www.karlrunge.com/x11vnc/faq.html#faq-passwd    @#
#@                                                           @#
#@  To disable this warning use the -nopw option, or put     @#
#@  'nopw' on a line in your ~/.x11vncrc file.               @#
#@                                                           @#
#@@@@@@@@@@@@@@@@@@@@@@@@@@@@@@@@@@@@@@@@@@@@@@@@@@@@@@@@@@@@@#
###############################################################
19/02/2018 18:19:44 x11vnc version: 0.9.13 lastmod: 2011-08-10  pid: 2416
19/02/2018 18:19:44 Using X display :0
19/02/2018 18:19:44 rootwin: 0x281 reswin: 0x2a00001 dpy: 0xf69b80
19/02/2018 18:19:44
19/02/2018 18:19:44 ------------------ USEFUL INFORMATION ------------------
19/02/2018 18:19:45 X DAMAGE available on display, using it for polling hints.
19/02/2018 18:19:45   To disable this behavior use: '-noxdamage'
19/02/2018 18:19:45
19/02/2018 18:19:45   Most compositing window managers like 'compiz' or 'beryl'
19/02/2018 18:19:45   cause X DAMAGE to fail, and so you may not see any screen
19/02/2018 18:19:45   updates via VNC.  Either disable 'compiz' (recommended) or
19/02/2018 18:19:45   supply the x11vnc '-noxdamage' command line option.
19/02/2018 18:19:45
19/02/2018 18:19:45 Wireframing: -wireframe mode is in effect for window moves.
19/02/2018 18:19:45   If this yields undesired behavior (poor response, painting
19/02/2018 18:19:45   errors, etc) it may be disabled:
19/02/2018 18:19:45    - use '-nowf' to disable wireframing completely.
19/02/2018 18:19:45    - use '-nowcr' to disable the Copy Rectangle after the
19/02/2018 18:19:45      moved window is released in the new position.
19/02/2018 18:19:45   Also see the -help entry for tuning parameters.
19/02/2018 18:19:45   You can press 3 Alt_L's (Left "Alt" key) in a row to
19/02/2018 18:19:45   repaint the screen, also see the -fixscreen option for
19/02/2018 18:19:45   periodic repaints.
19/02/2018 18:19:45
19/02/2018 18:19:45 XFIXES available on display, resetting cursor mode
19/02/2018 18:19:45   to: '-cursor most'.
19/02/2018 18:19:45   to disable this behavior use: '-cursor arrow'
19/02/2018 18:19:45   or '-noxfixes'.
19/02/2018 18:19:45 using XFIXES for cursor drawing.
19/02/2018 18:19:45 GrabServer control via XTEST.
19/02/2018 18:19:45
19/02/2018 18:19:45 Scroll Detection: -scrollcopyrect mode is in effect to
19/02/2018 18:19:45   use RECORD extension to try to detect scrolling windows
19/02/2018 18:19:45   (induced by either user keystroke or mouse input).
19/02/2018 18:19:45   If this yields undesired behavior (poor response, painting
19/02/2018 18:19:45   errors, etc) it may be disabled via: '-noscr'
19/02/2018 18:19:45   Also see the -help entry for tuning parameters.
19/02/2018 18:19:45   You can press 3 Alt_L's (Left "Alt" key) in a row to
19/02/2018 18:19:45   repaint the screen, also see the -fixscreen option for
19/02/2018 18:19:45   periodic repaints.
19/02/2018 18:19:45
19/02/2018 18:19:45 XKEYBOARD:
19/02/2018 18:19:45 Switching to -xkb mode to recover these keysyms:
19/02/2018 18:19:45    xkb  noxkb   Keysym  ("X" means present)
19/02/2018 18:19:45    ---  -----   -----------------------------
19/02/2018 18:19:45     X           0x40  at
19/02/2018 18:19:45     X           0x5b  bracketleft
19/02/2018 18:19:45     X           0x5d  bracketright
19/02/2018 18:19:45     X           0x7b  braceleft
19/02/2018 18:19:45     X           0x7d  braceright
19/02/2018 18:19:45     X           0x7c  bar
19/02/2018 18:19:45     X           0x5c  backslash
19/02/2018 18:19:45
19/02/2018 18:19:45   If this makes the key mapping worse you can
19/02/2018 18:19:45   disable it with the "-noxkb" option.
19/02/2018 18:19:45
19/02/2018 18:19:45
19/02/2018 18:19:45 X FBPM extension not supported.
19/02/2018 18:19:45 X display is capable of DPMS.
19/02/2018 18:19:45 --------------------------------------------------------
19/02/2018 18:19:45
19/02/2018 18:19:45 Default visual ID: 0x21
19/02/2018 18:19:45 Read initial data from X display into framebuffer.
19/02/2018 18:19:45 initialize_screen: fb_depth/fb_bpp/fb_Bpl 24/32/4416
19/02/2018 18:19:45
19/02/2018 18:19:45 X display :0 is 32bpp depth=24 true color
19/02/2018 18:19:45
19/02/2018 18:19:45 Autoprobing TCP port
19/02/2018 18:19:45 Autoprobing selected TCP port 5900
19/02/2018 18:19:45 Autoprobing TCP6 port
19/02/2018 18:19:45 Autoprobing selected TCP6 port 5900
19/02/2018 18:19:45 listen6: bind: Address already in use
19/02/2018 18:19:45 Not listening on IPv6 interface.
19/02/2018 18:19:45
19/02/2018 18:19:45 Xinerama is present and active (e.g. multi-head).
19/02/2018 18:19:45 Xinerama: number of sub-screens: 1
19/02/2018 18:19:45 Xinerama: no blackouts needed (only one sub-screen)
19/02/2018 18:19:45
19/02/2018 18:19:45 fb read rate: 500 MB/sec
19/02/2018 18:19:45 fast read: reset -wait  ms to: 10
19/02/2018 18:19:45 fast read: reset -defer ms to: 10
19/02/2018 18:19:45 The X server says there are 13 mouse buttons.
19/02/2018 18:19:45 screen setup finished.
19/02/2018 18:19:45
19/02/2018 18:19:45 WARNING: You are running x11vnc WITHOUT a password.  See
19/02/2018 18:19:45 WARNING: the warning message printed above for more info.
19/02/2018 18:19:45

The VNC desktop is:      debian.domain.box:0
PORT=5900

******************************************************************************
Have you tried the x11vnc '-ncache' VNC client-side pixel caching feature yet?

The scheme stores pixel data offscreen on the VNC viewer side for faster
retrieval.  It should work with any VNC viewer.  Try it by running:

    x11vnc -ncache 10 ...

One can also add -ncache_cr for smooth 'copyrect' window motion.
More info: http://www.karlrunge.com/x11vnc/faq.html#faq-client-caching

# leave the program running
# open a new terminal on the client
# it should now be possible to connect to "full desktop" like this
# on the client
ssh user@192.168.0.101 -L 5900:localhost:5900
# open another terminal
vncviewer localhost:5900

# it should connect :D
# securit is provided by ssh auth and encryption, not by vnc :D

# it might be usefull to disable the graphical login prompt on the server
# and put the this line
x11vnc -display :0 -auth .Xauthority -rfbauth /home/user/.vnc/passwd -forever
# somewhere in the autostart process (STILL USING rc.local :D)
vim /etc/lightdm/lightdm.conf;
# comment out those two lines
autologin-user=username
autologin-user-timeout=0
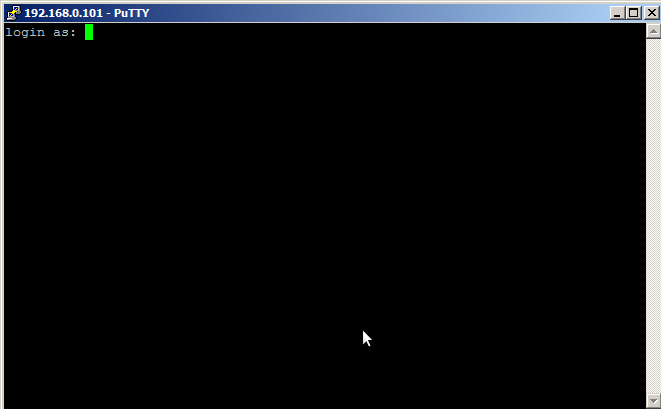
time to connect
on the same machine that your ssh-terminal is running fire up a vnc client
centos7:
yum install vnc
# installs
tigervnc.x86_64 1.8.0-2.el7_4 @updates
installs tigervnc viewer, for windows user realvnc
possible errors
if you get:
channel 3: open failed: administratively prohibited: open failed
you will have to enable:
AllowTcpForwarding yes
in:
vim /etc/ssh/sshd_config
# save quit and restart
systemctl restart sshd
now RECONNECT and it should work again.
perfectly!
exactly what i wanted.
# start again x11vnc server with pixel caching and pass auth
x11vnc -display :0 -auth .Xauthority -ncache 10 -rfbauth /home/user/.vnc/passwd
but it seems a lot of vnc viewer clients DO NOT SUPPORT this feature and display funny stuff…
“x11vnc noncache – this is the pixel buffer cache region – your vnc viewer is not hiding it from you – pay no attention to the man behind the curtain” X-D
![]()
define resolution and other settings
all options: x11vnc all options.manpage.txt
what i do is save the “vnc startup command” in
vim /scripts/start_vnc.sh
currently it reads like:
x11vnc -display :0 -geometry 1366x768 -auth .Xauthority -rfbauth /home/user/.vnc/passwd
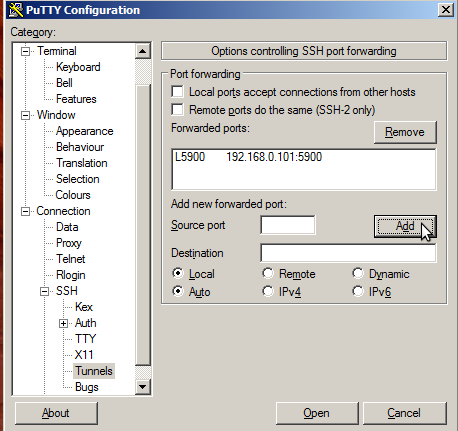
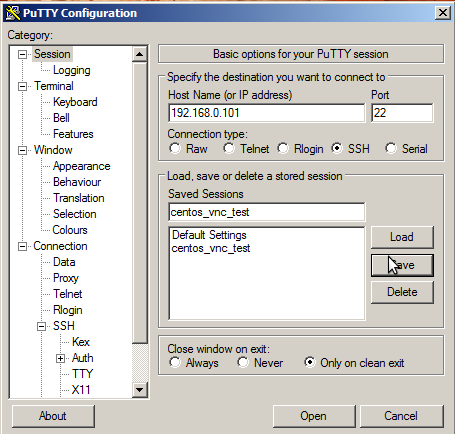
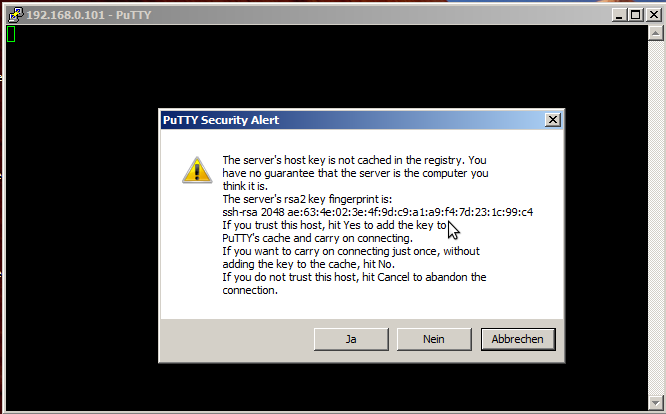
ssh tunnel from windows<-ssh->linux via putty
putty is really a neat beast… it can do ssh port forwarding from windows to linux. GOOD JOB!

open port in firewall?
INSECURE! if you use the ssh port-forwarding-tunnel you DO NOT NEED to even open a port – because you are connecting to localhost. on the client and server 😉
firewall-cmd --zone=public --add-port=5900/tcp --permanent; # open port 5900firewall-cmd --reload; # make changes active
remove tigervnc:
if you already have installed it and tried to config it in vane, get rid of it and reboot…
yum remove tigervnc-server.x86_64
yum remove tigervnc-server-minimal.x86_64
yum remove tigervnc-license.noarc
misc debug stuff:
# monitor all logs
find /var/log/ -type f \( -name "*" \) ! -path '*.gz*' -exec tail -n0 -f "$file" {} +
what display session is active?
your desktop gnome2 mate or other uses a session, vncserver needs to know what session you would like to screen-share:
loginctl list-sessions
   SESSION        UID USER             SEAT
         1       1000 user             seat0

loginctl show-session -p Display -p Active 1
Display=:0
Active=yes

lsof -i -P -n|grep vnc; # check if vncserver is running and listening
x11vnc 1888 user 10u IPv4 25838 0t0 TCP *:5900 (LISTEN)
x11vnc 1888 user 11u IPv6 25839 0t0 TCP *:5900 (LISTEN)
x11vnc 1888 user 12u IPv6 23301 0t0 TCP [::1]:5900->[::1]:53956 (ESTABLISHED)
Links:
http://www.karlrunge.com/x11vnc/
http://www.karlrunge.com/x11vnc/ssvnc.html
liked this article?
- only together we can create a truly free world
- plz support dwaves to keep it up & running!
- (yes the info on the internet is (mostly) free but beer is still not free (still have to work on that))
- really really hate advertisement
- contribute: whenever a solution was found, blog about it for others to find!
- talk about, recommend & link to this blog and articles
- thanks to all who contribute!